Historical Background
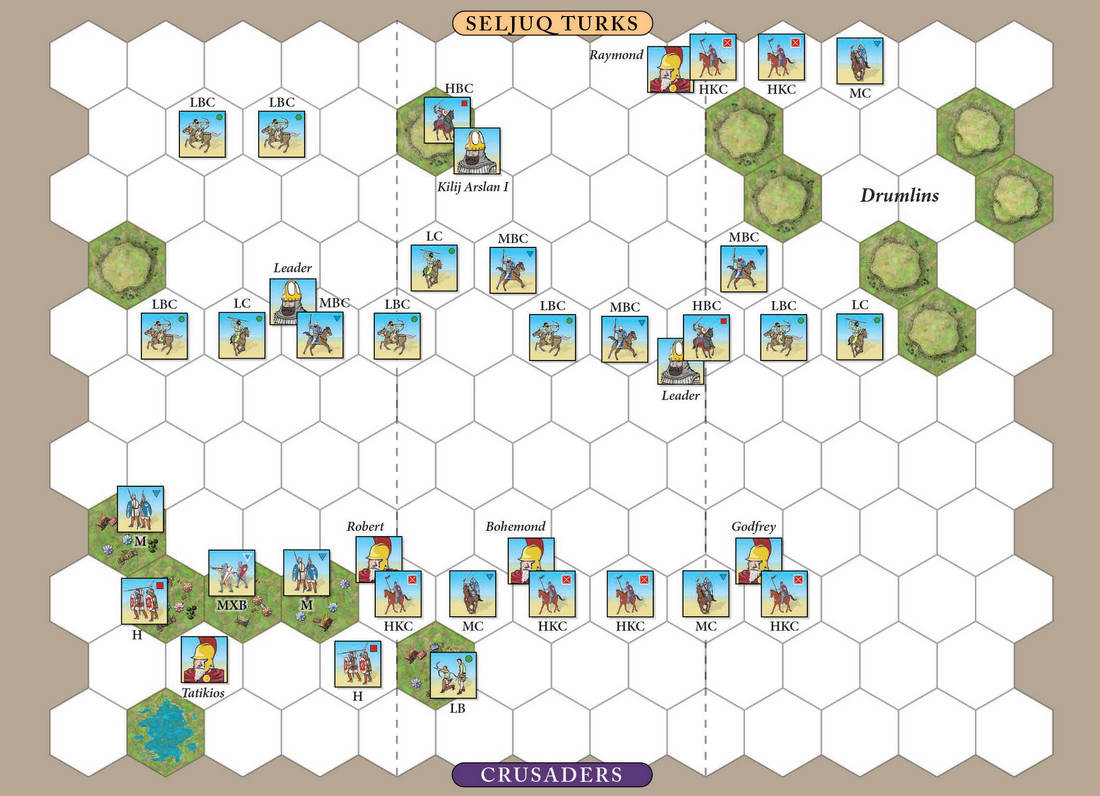
While the Crusader cavalry units of Bohemond of Taranto and Godfrey of Bouillon pushed forward against Kilij Arslan’s Turkish units, a follow-on Crusader cavalry force had advanced through a series of drumlins to the left of Kilii Arslan’s army.
These elongated hills formed by glacial drift, served to allow Raymond’s Crusader cavalry to advance unobserved and to get behind the Turkish army. The combined assault which broke against both the front and rear of Kilij Arslan’s Turkish army proved to be too much for the Turks, who suffered heavy casualties. The routed Turkish army retreated hastily to the south.
The stage is set. The battle lines are drawn and you are in command. Can you change history?
War Council
Seljuq Turks Army
• Leader: Kilij Arslan I
• 5 Command Cards
• 3 Inspired Actions tokens
 |
 |
 |
 |
 |
| 3 | 3 | 6 | 2 | 4 |
Crusaders Army
• Leader: Bohemond
• 6 Command Cards
• 4 Inspired Actions tokens
• Move First ![]()
 |
 |
 |
 |
 |
 |
 |
| 5 | 6 | 2 | 1 | 1 | 3 | 2 |
Victory
7 Banners
Special Rules
- Retreat & Panic rule is in effect for the Seljuq Turk army.
- All Seljuq Turk Medium and Heavy cavalry units are armed with bows. No need to place bow markers. Some Light Cavalry are armed with bows. Use the proper bow and non-bow Light Cavalry blocks for these different units.