A unit is composed of a certain number of blocks:
Foot Units
• All Light Bow, Auxilia, Auxilia Bow, Medium, Medium Crossbow, Heavy and the Foot Knight and Military Order Foot Knight units. Infantry units are composed of four small
size blocks.
Mounted Units
• All Light, Light Bow, Turcopole Light Bow, Medium, Medium Bow, Heavy, Heavy Bow, Heavy Knight, Military Order Heavy Knight and the Super Heavy Cavalry units are composed of four Medium size blocks.
Leaders
• A Leader is not a unit.
• A Leader is represented by one rectangular block.
Unit Symbols and Colors
To help identify a unit’s type, color symbols have been placed on each label.
Green circle: Light Bow Infantry, Light Cavalry, Light Bow Cavalry
Green circle with white border: Auxilia Infantry, Auxilia Bow Infantry, Turcopole Light Bow Cavalry
Blue triangle symbol: Medium Infantry, Medium Cavalry, Medium Bow Cavalry
Blue triangle symbol with white border: Medium Crossbow Infantry, Warrior Infantry (none in expansion)
Red square symbol: Heavy Infantry, Heavy Cavalry, Heavy Bow Cavalry
Red symbol with square white border: Super Heavy Cavalry
Red square symbol with swords and white border: All Foot Knight Infantry, Heavy Knight Cavalry
Unit Markers
In this expansion, a player’s army may be required to deploy units that require markers to help identify the unit. These special units are indicated on the scenario map by the unit’s lettering. A player must place the proper marker on these special units to help keep track of these units. A marker will remain with the unit until the last block in the unit is eliminated. The marker is also removed when the last unit block is removed from the battlefield.
Bow/Non-Bow Weapon Markers
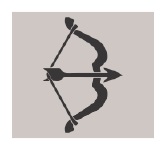
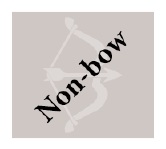
When a scenario has cavalry units of the same type with some units armed with bows and some not armed with bows use the bow/non-bow markers on these units. A player should place a marker with the proper side face up, bow or non-bow, on these units to help keep track which cavalry units have bow weapons and which do not. How units are armed is detailed in the scenario special rules and is also indicated by the unit’s lettering on the scenario map.
NOTE: When all cavalry units in an army of a certain type are armed with bows, there is really no need to place bow markers.
Victory Banners
The Victory Banners are used to track a player’s quest for victory.
Crusader (left), Middle Eastern (right)
Crusader Relic Marker
Some scenarios will call for the Crusader forces to carry a holy relic. The unit carrying the relic is marked on those scenario maps.
Inspired Action Reference Sheet and Inspired Action Tokens
A Crusader army and each Mid-Eastern army will have its very own unique Inspired Action Reference Sheet. Some Inspired Actions vary by army and may even change over time.
Inspired Leadership Actions - When a “Leadership” Command card is played on a turn, the player may choose to spend one Inspired Action token and elect to have the units that are ordered by the Leadership Command card perform one of the Inspired Leadership Actions as listed on the army inspired reference sheet.
Battlefield Actions - There is also a list of Battlefield Actions that can be called upon by a player during a player’s turn or the opponent’s turn. These battlefield actions are not tied to the play of a Leadership Command card. A player just spends one Inspired Action token to have his unit or Leader perform a battlefield action on the list.
NOTE: Some Inspired Leadership Actions and Battlefield Actions are brand new and others have been modified and updated for clarity.
New - Inspired Leadership Actions
• Line Command: This Inspired Leadership Action is similar to the Command card Line Command, with a leader acting as the focal point from which the group of units and leaders in adjacent linked, contiguous hexes are ordered.
• Fighting March: Basically this Inspired Leadership Action is similar to the Line Command, see previous.
• Hit & Run: This Inspired Leadership Action allows ordered cavalry units to perform a new action of move—close combat and then—move again.
New - Battlefield Actions
• Light Cavalry Swarm
• Rally on Leader
• Recall
• Shower Shooting
Inspired Leadership Action Clarifications
When an Inspired Leadership Action orders units that are a combination of both cavalry and foot units, only one type of unit, either the cavalry or the foot will usually gain the benefit
of the Inspired Leadership Action as follows:
• Inspired Leadership Action—Mounted Charge: Foot units may still be ordered to move and battle normally, while the cavalry units that are ordered must charge if they do anything.
• Inspired Leadership Action—Foot Onslaught: Foot units must foot onslaught and may not engage in ranged combat. Cavalry units may still be ordered to move and battle normally.
• Inspired Leadership Action—Hit & Run: Foot units may still be ordered to move and battle normally, while the cavalry units that are ordered must Hit & Run.
When an Inspired Leadership Action orders units that are a combination of units with ranged weapons and units that do not have ranged weapons, the units with ranged weapons gain the benefit of the Inspired Leadership Action as follows:
• Inspired Leadership Action—Darken the Sky: Ranged Weapon units must engage in ranged combat and may not move. Units that do not have ranged weapons may be ordered
to move and battle normally.
• Inspired Leadership Action—Move Fire Move: Ranged Weapon units must engage in ranged combat and may move before and after ranged combat. Units that do not have ranged weapons may be ordered to move and battle normally.
• Inspired Leadership Action—Fire and Close: Ranged Weapon units must engage in ranged combat and may move to close after the unit’s ranged combat. Units that do not have ranged weapons may be ordered to move and battle normally.
Additional Fire and Close Inspired Leadership Action Clarifications
• If the firing unit cannot move adjacent to the unit it targeted, the firing unit cannot move.
• If the firing unit can move adjacent to the unit it targeted, it must do so. However, it is not required to attack the targeted unit.
• If the firing unit chooses to have close combat with the targeted unit, it may attack. If the target unit is eliminated or forced to retreat, the firing unit may momentum advance and, if eligible, conduct bonus close combat against any adjacent enemy units.
Turk or Ayyubid Light Cavalry Swarm Battlefield Action Clarifications
The medieval Middle-Eastern version of a combined arms attack. By utilizing multiple speed, shock and missile attacks, even heavily armed Crusader units could be thoroughly disrupted and defeated in detail.
1. Conduct combat using the basic system rules, modified by Expansion rules and Light Cavalry Swarm instructions.
2. The most powerful Swarm Attacks will contain both Light Bow Cavalry and Light Cavalry units plus a Leader.
• A Swarm Attack made solely by ordered Light Bow Cavalry units could not count any sword hits rolled. For all sword hits to count, one or more Light Cavalry units must engage in Close Combat.
• For all Leader hits to count, a leader must be attached to either an ordered Light or Light Bow cavalry unit engaging in Close Combat.
3. Applying all eligible dice results simultaneously before the Crusader unit gets to respond showcases the cumulative effectiveness of ground and missile attacks coming from all directions that caused loss and destroyed Crusader unit cohesion.
4. Targeting a Crusader light bow infantry or light cavalry unit of any type that can evade: The Swarm Attack would still roll all dice, but could only count symbol hits after evade announced.
5. Crusader counter-measures:
• The Crusader player may play a First Strike card against an adjacent attacking unit before the Swarm Attack dice are rolled. The result could reduce the number of Swarm Attack dice rolled or prohibit counting sword and/or leader hits.
• The Crusader player may spend an Inspired Action chit for Brave Unit after retreats are allocated, allowing the defending unit to remain in the hex and battle back even if reduced.
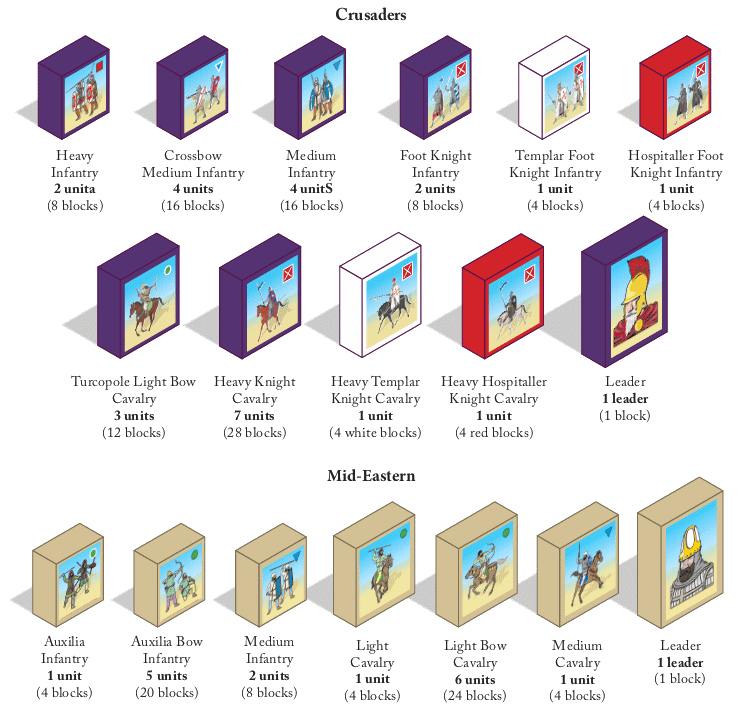
Applying the Stickers from the Label Sheets
Apply appropriate unit stickers to the front and back of the blocks for each unit. Place the Crusader unit stickers on the purple, red and white blocks. The Crusader red and white blocks are for the Military Order Templar and Hospitaller foot and mounted units (see the block images for these units in the Crusades Units recap and review section). Mid-Eastern unit stickers on the tan blocks. We suggest separating the blocks by color, then sort blocks by size. Start with the Crusader units. Pull out 16 small purple blocks. Find the Crusader Medium Infantry stickers on sheet 3 of 3. Peel and place a sticker on the front and back of the 16 small purple blocks. When you run out of the 16 blocks, move on to the Crusader Crossbow Medium Infantry. Pull out 16 small purple blocks. Find the Crusader Crossbow Medium Infantry stickers on sheet 3 of 3. Peel and place stickers on the front and back of the 16 small purple blocks. When you run out of 16 blocks, move on to the Crusader Heavy Infantry units that need 8 blocks. Keep going in this fashion until all the Crusader units are completed. Then move on to Mid-Eastern units and tan blocks. It will take a little time, but it will be worth the effort! Note: A few extra blocks and stickers are supplied as spares.